Two relatively simple options to improve the WR headlight are to install a headlight relay for the existing bulb, and auxiliary LED lighting to provide more reach and spread than the stock bulb alone can deliver. The headlight relay eliminates lumen-sapping voltage drops caused by the stock wiring (which routes power through the bar switch on rather thin wires), by providing a more direct electrical path through heavier wiring. The existing wiring remains in place and controls relays which send the juice through the parallel heavier wires. As for LEDs, a simple test using my battery-powered mountain bike LED lights shows that the additional 980 lumens mounted on the forks completely drowns out the stock headlight.
So first: what relay solution?
Headlight relay
Many mod sites pointed to the Eastern Beaver wiring products offered by a Canadian who now lives in Japan. Admittedly, I was somewhat reluctant to order a relatively simple wiring kit from that far away--even from a fellow Canadian. However, a closer look at the details suggested his products were pretty good quality, and I know from experience how time-consuming it can be sourcing small quantities of oddball electrical components. So I caved and ordered the headlight kit as well as a switched relay kit and some other items for other mods. Having placed my order on a Tuesday evening, I was blown away that it arrived at my doorstep on the Friday morning! That's some seriously high quality delivery service from halfway around the world!
The quality of the Eastern Beaver wiring kits is indeed absolutely top-notch and likely much better than your OE wiring harness. Although the kits I ordered are not intended for a specific motorbike, the lengths worked out perfect for the WR without leaving any tight spots or excess wire length that was a problem to tuck away.
Where to mount the headlight relays? The solution I devised was to fabricate an aluminum bracket. It tucks inside the headlight fairing above and behind the headlight, right in front of the speedo. This approach offers good mechanical support and protection from the elements, while being easy to access without requiring drilling or modifying the existing wiring (although you do need to cut a zip tie to move an existing bundle of wires).
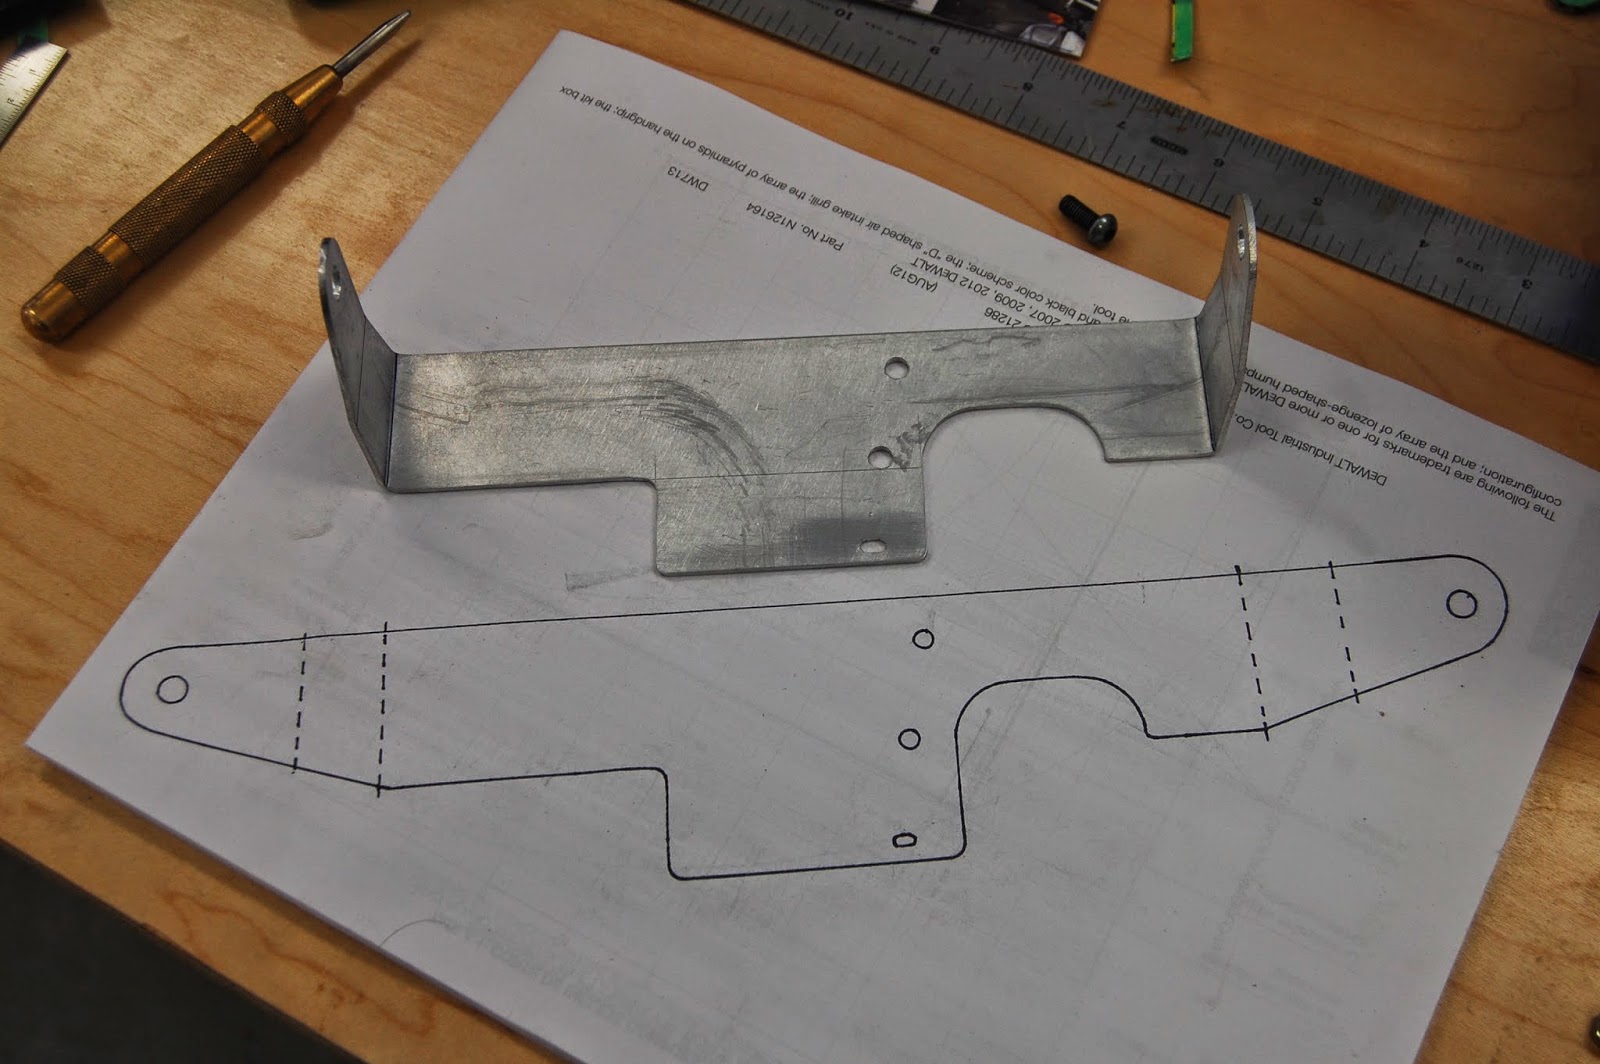

The pattern is traced from the one I made. The image size should be 8.5" x 11", so if you print it at 100% scale the dimensions should be correct. Cut it out of 1/16" aluminum, drill it, and bend it as shown so it fits behind the headlight fairing using the stock mounting bolts. Note that the two bends at each end need to match the inside profile of the "ears" from the headlight fairing. The Easter Beaver relays and wires simply attach using bolts with nyloc nuts, and zip-ties. It's a tight spot and you'll have to play around with it to tune the fit. I also bent a small bracket to provide some mechanical support in the middle. Watch that none of the wires rib on any shape edges.
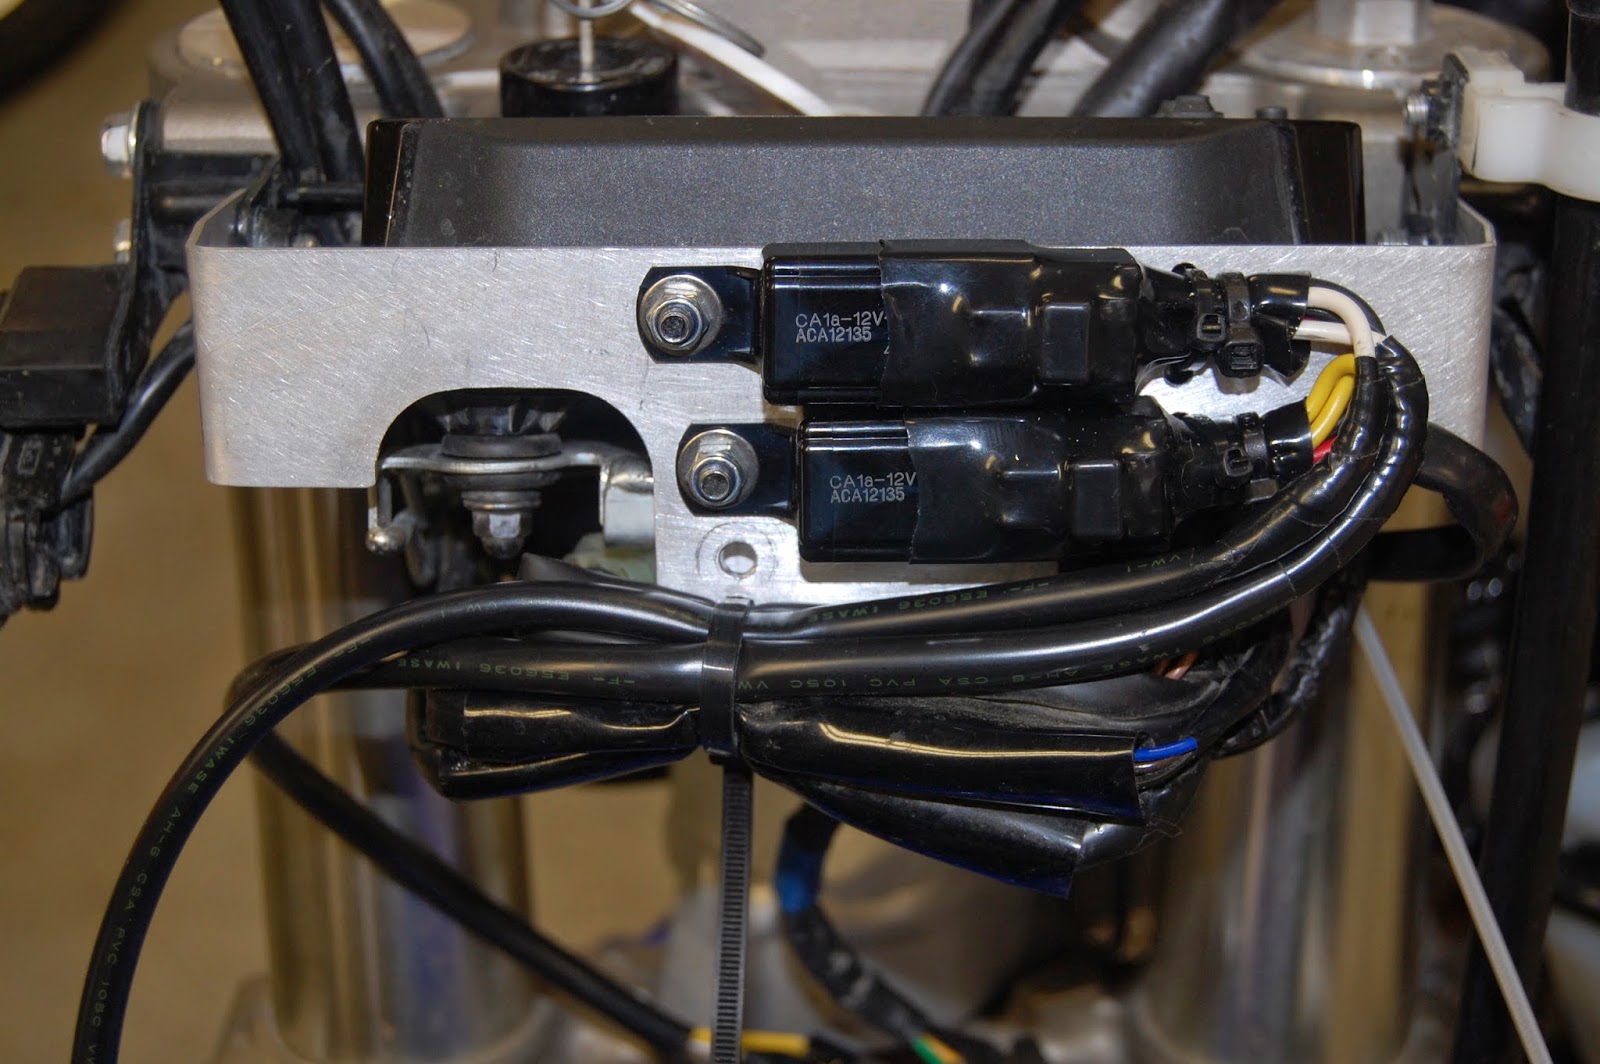
Here's a view of the bracket behind the relay mount. It's a tight fit to insert the front bolt, so I didn't end up using one there. The bracket alone seems to provide adequate support without the bolt anyway.


Here's the bracket after a cheap and sleazy shot of black enamel.

Wiring it in
After mounting the relays I fed the wiring back through the frame on the left side, over the cylinder head and inside the frame area above the battery. There I wired it directly to the battery. There's no need to use a key-switched power source since the headlight relays themselves provide an automatic power-off function. Use lots of zip ties to secure wires against vibration, and be sure to leave enough slack for the bars to turn without pinching or pulling on anything that could result in a broken wire.
At the headlight end I opted to remove the existing female connector from the wiring harness (which normally plugs into the bulb) and splice the ground, low-beam, and high-beam wires directly into the Eastern Beaver kit with solder joints and adhesive heat-shrink tubing for weatherproofing. The relay wiring kit includes a new connector for the bulb (switched by the relays). Note that you can't just match colors - the high/low beam colors on the kit are reversed from those on the OE wiring.
So how it works is the existing switchgear just activates either the low beam or high beam relay, which in turn sends power to the bulb directly from the battery. The result is a noticeably brighter headlight.
The whole shebang adds one more point of failure for the headlights via the additional relays. However, arguably the system is now more reliable because the existing switchgear and wiring is no longer a long, complex wiring path carrying full lighting load.
Next up is to install some LED driving lights. After studying dozens of options through vendor websites and rider forums, the best technology appears to be a Clearwater product. Unfortunately they are expensive. The best alternative at lower cost seems to be a Fenix light with Skene controller. I'll cover those in a future post once I can order the bits from Matt Dynes at Motorcycle Innovations and test them on the WR. Can't wait for some real light!
Happy to have found this write up, as I've just bought a new WR and am looking to thoughtfully improve it's electric capabilities- existing headlight, adding aux lights, etc. I've seen the Eastern Beaver goods mentioned before and am going to give them a go!
ReplyDelete